
These past two weeks have been an ice age, especially for the tri-state area. New York City even implemented a Code Blue to shelter anyone seen outdoors during the severe weather conditions. That got me thinking; what about the animals? Is there a system in place to shelter them, too? In our December blog, we addressed the dangers of the cold for dogs. What about the cats, specifically those who do not have a home? I decided to help where I could, by making an outdoor shelter for feral cats.
There is a neighborhood cat that roams around. He is friendly and accepts food, but never lets you get close enough to pet him, let alone scoop him up to bring indoors or to the vet. As much as I would like to think he has a nice warm hidey-hole to hibernate in, the reality is he may not. I have heard a lot of talk about outdoor shelters for feral cats and thought it was a purrfect opportunity to build one of my own. D.I.Y.-selfers rejoice! Here are step-by-step instructions on how to build your own shelter for your furry outdoor friends!
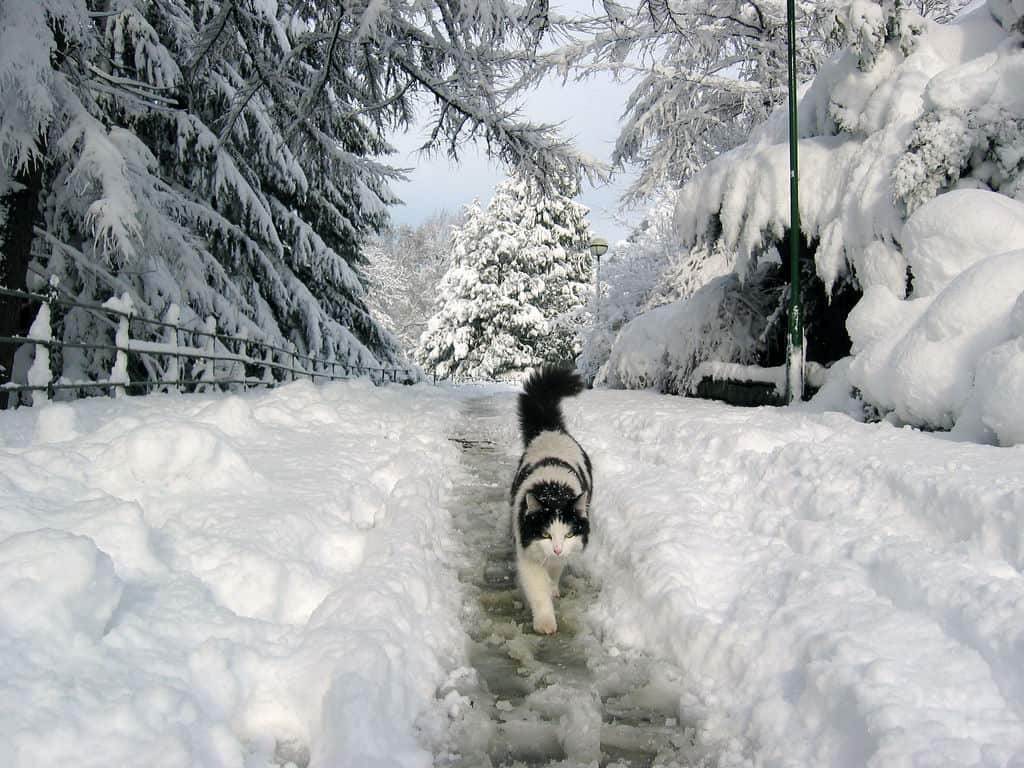
Photo By: Jill
Step 1: Gather your materials for Outdoor Shelter
To get started, you need supplies. A 20-gallon bin works best. Find it at your local Walmart, Target or even Dollar Tree. Heavy duty duct tape, some scissors, utility knife, a sharpie, a ruler, small animal bedding such as straw, a small cat bowl (optional) and a roll of reflective insulation from your local Lowe’s or Home Depot. Once you’ve gathered your materials you are ready to start building your outdoor shelter for feral cats!

20 gallon heavy duty plastic bin with lid.
Step 2: Prep
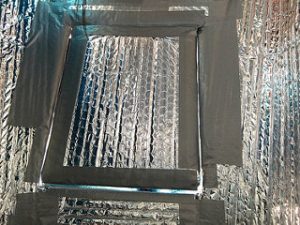
Using the sharpie and ruler, measure and draw a 5 X 7 rectangle onto the bin, leaving a few inches between the bottom line and the ground level; you just drew the door! Next, measure the width and length of the bin lid and cut those dimensions from your insulation roll. Measure the inside of your bin. To make life easier most product stickers have the dimension of the item already on there. If so, measure that onto your insulation and cut. Don’t forget the bottom as well! Lastly, cut out a 5 X 7 rectangle of insulation for the door. When you get to the point of taping down your cut insulation you will see if there are any extra pieces you’ll need to cut out to fill in gaps.

Draw a 5 X 7 rectangle onto the bin leaving a few inches between the bottom line and the ground level

measure the lid

Measure the inner dimension
Step 3: Assemble Outdoor Shelter
Using your utility knife, carefully cut out the drawn rectangle on the bin; if cutting proves difficult, heat the blade with a lighter and a smoother cut will be easier to achieve. Don’t toss what you cut! That will become your swinging door. Next, gather your cut insulation and begin to tape it down with your duct tape. Don’t be meager on the taping! Use as much as you need to ensure the insulation is well placed. This is going to help maintain the heat the cat will generate themselves while inside. The final step to the assembly of your outdoor shelter for feral cats is attaching your door. You want to make sure it swings both in and out so make sure to evenly distribute the tape inside and out, not favoring one side. At this point, your bin should look like the inside of a spaceship!

Carefully cut out the drawn rectangle on the bin.

Don’t be meager on the taping!

The inside of a spaceship!
Step 4: Final touches
Now that your outdoor shelter for feral cats is constructed, the finishing touches will bring it all together. Place an even layer of straw at the bottom of the bin. I know it’s tempting to throw in a nice fleece blanket in there, but blankets, towels, and newspaper will retain moisture and actually make the cat colder. If you want to make it a little homier include a small cat bowl with some kibble for your guest.
Distribute the tape inside and out.
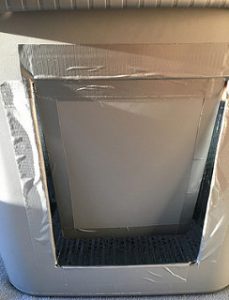
Make sure it swings both in and out.

A small cat bowl with some kibble is a nice touch.
Step 5: Placement of Outdoor Shelter
Your outdoor shelter for feral cats is complete and it’s ready to go for a spin; now it’s just figuring out where best to place it! You want to make sure it’s not directly on the ground. If you don’t have a table or stand to place it on, you can throw some two 2 X 4 underneath it to hold it up. If your shelter is on the lighter side, throw another 2 X 4 on top to help with heavy winds. An extra tip, slightly tilting the bin helps so if it rains the water will roll off rather than remain sitting on top.
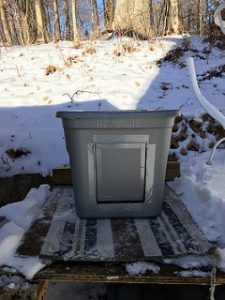
High enough off the ground; low enough to get in.
Whether you’re doing it for a specific animal in mind or just for any animal that is in need, rest assured that they will be grateful for the cozy home you have just gifted them. An hour of your time and $25 or less of your wallet could save a life (or lives) during these harsh conditions we’re facing and will continue to face. The best part is its usability. Once winter is over, you can store it away for the next winter or keep outside as a year-round shelter for whoever passes by.
A forever shelter for those who have yet to find their forever homes.

Photo By: Paul Joseph
Have any suggestions to make the shelter even better? Some comments, questions or concerns? Let us know below!
This is such a thoughtful and compassionate project! With the winter months hitting hard, it’s easy to forget how much our feral feline friends suffer out in the elements. I love how you broke down each step of building a DIY outdoor cat shelter—it makes the process feel approachable for anyone who wants to help out the local stray or feral cats in their neighborhood.
Your tip about using straw instead of blankets was so helpful, as it’s something many might overlook when trying to make the shelter cozy. I also appreciate the advice on slightly tilting the shelter to prevent water from pooling on top—that’s a simple but effective way to ensure it stays dry inside.
For anyone looking to give back to animals this winter, this is such a great way to provide a safe, warm space for feral cats to escape the harsh weather. It’s heartwarming to think that a small investment of time and money can make such a big difference in the lives of these animals. Thank you for sharing this detailed guide!
I’m curious if there are other ways to make the shelter even more insulated for extreme cold—has anyone tried adding a flap over the door to reduce drafts even further?